Arduino - Ethernet
The main way of communicating with an Arduino module is normally through an emulated serial port via a USB connection. However, it is relatively easy to add an Ethernet interface.
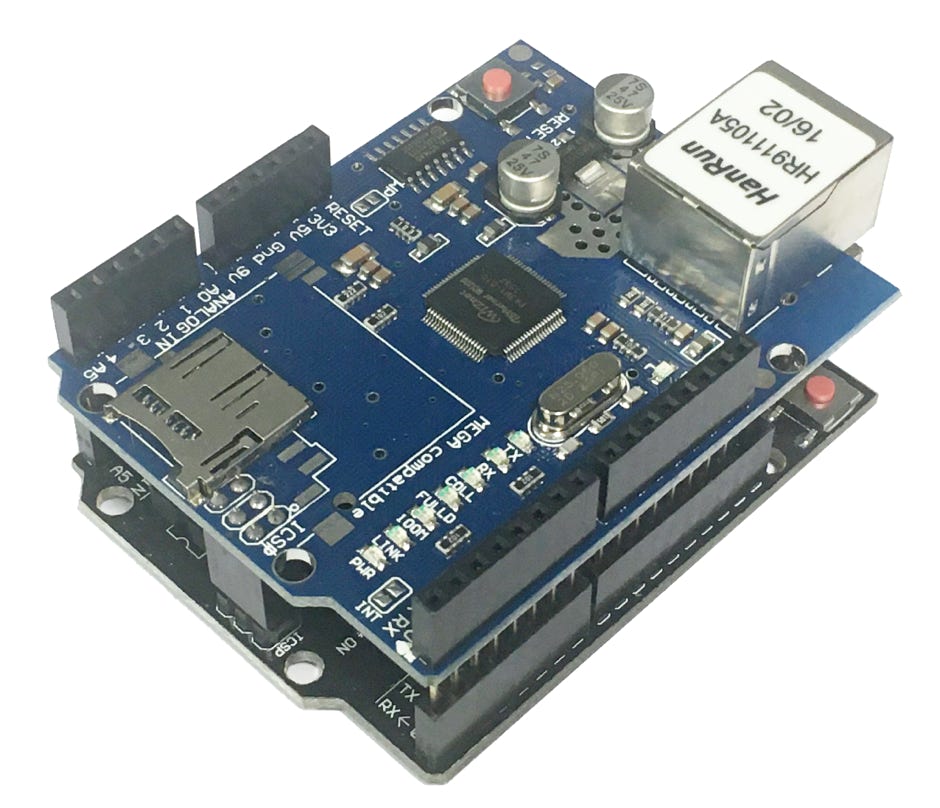
One of the easiest and cheapest ways of experimenting with an Ethernet controlled Arduino is to add the Arduino Ethernet Shield to the Arduino Uno. The shield consists of a plug-in board that mounts on top of the Arduino, adding the necessary RJ45 port and an Ethernet Controller.
There are various examples to be found within the Arduino IDE, allowing an Ethernet connected Arduino to be a UDP/TCP client and server.
Example Code
The following code demonstrates how to control an Arduino connected via Ethernet using LabVIEW.
Shown below is the Arduino code:
#include <SPI.h>
#include <Ethernet.h>
#include <avr/wdt.h>
// Enter a MAC address and IP address for your controller below.
byte mac[] = {
0xDE, 0xAD, 0xBE, 0xEF, 0xFE, 0xED };
IPAddress ip(192, 168, 1, 1);
IPAddress myDns(192, 168, 1, 1);
IPAddress gateway(192, 168, 1, 1);
IPAddress subnet(255, 255, 255, 0);
// telnet defaults to port 23
EthernetServer server(23);
boolean alreadyConnected = false; // whether or not the client was connected previously
// client
EthernetClient client;
void setup() {
// initialize the ethernet device
Ethernet.begin(mac, ip, myDns, gateway, subnet);
// Open serial communications for debug purposes
Serial.begin(9600);
// Check for Ethernet hardware present
if (Ethernet.hardwareStatus() == EthernetNoHardware) {
Serial.println("Ethernet shield was not found. Sorry, can't run without hardware. :(");
}
if (Ethernet.linkStatus() == LinkOFF) {
Serial.println("Ethernet cable is not connected.");
}
// start listening for clients
server.begin();
// Report address
Serial.print("Address:");
Serial.println(Ethernet.localIP());
// Set digital lines
pinMode(2, OUTPUT);
// Enable watchdog timer with 2 second timeout
wdt_enable(WDTO_2S);
}
void loop() {
// wait for a new client:
client = server.available();
// check if client is connected
if (client) {
// check for command byte
if (client.available() > 0) {
byte command = client.read();
if (command == 'A') client.print("Arduino");
if (command == 'B') setDigital();
}
}
// Reset watchdog timer
wdt_reset();
}
void setDigital() {
// Wait for one byte of data
wdt_reset();
do {} while(client.available() < 1);
byte data = client.read();
// Set port
if (data=='0') { digitalWrite(2, LOW); Serial.println("Low"); }
if (data=='1') { digitalWrite(2, HIGH); Serial.println("High"); }
// Reply
client.print("B");
}
The Arduino sets the address of the Ethernet interface to be 192.168.1.1 then allows a client to connect using a standard TCPIP connection on port 23. When the computer is connected it can send simple single bytes commands to the unit.
In the above example sending an ‘A’ command is a simple connection check, the Arduino will respond with the text ‘Arduino’. Sending a ‘B’ command followed by a ‘0’ or a ‘1’ allows a digital line to be switched either high or low. Note that the ‘B’ command also responds with a ‘B’ character to prove that the command has been actioned.
A watchdog timer has been set to 2 seconds allowing the Arduino to reset if a single command locks up for any reason.
Shown below is the LabVIEW code used to communicate with the Arduino using the standard TCP functions:
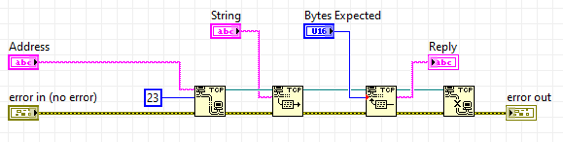
The following LabVIEW code checks that the Arduino is connected and responding:
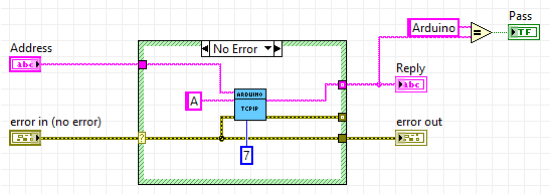
The unit is sent a single byte, an ‘A’, and seven characters are expected back containing the string ‘Arduino’.
The following LabVIEW code sets a digital output on the Arduino using the ‘B’ command:
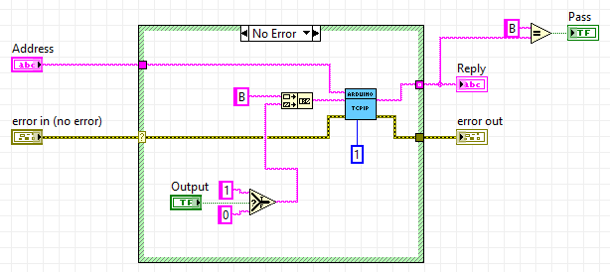
The Arduino is sent two bytes, the ‘B’ command followed by either a ‘0’ or a ‘1’. The Arduino always responds with a ‘B’.
Downloads
The above code samples can be downloaded here:
The Arduino brand, Arduino logo, and design of the Arduino boards are copyright of Arduino SA.
LabVIEW is a trademark of National Instruments Corporation.
Copyright 2022 APG Consultancy LTD
Email: info@apg-consultancy.co.uk